
Start Blogging with WordPress
Learn how to create a blog in about 20 minutes following these steps:
- Pick a blog name. Choose something descriptive.
- Get your blog online. Register your blog and get hosting.
- Customize your blog. Choose a free template and tweak it.
- Write & publish your first post. The fun part!
- Promote your blog. Get more people to read your blog.
- Make money blogging. Choose from several options to monetize your blog.
Let’s start your blog!

Step 1: Pick a blog name
The first step to finding a good blog name is choosing your topic.
If you’re not sure what to blog about, there are a few ways to find a good blog topic:
- Hobbies & passions. Hobbies or other interests you are passionate about are a great place to start. Cooking, travel, fashion, sports, and cars are all classic examples. But even blogs about more obscure hobbies can be successful, since the your audience is literally anyone in the world with the internet.
- Life experiences. Everyone has lessons they have learned through life experience. Sharing this knowledge can be incredibly helpful to others in similar situations. For example, I recently helped a woman start her blog about being a fireman’s wife. She has a lot of experience and knowledge to share with others about this topic, and it has helped her connect with others in similar situations.Think about the things you have experienced in life. This could be related to your family (example: a blog about being a stay at home mom), work (a blog about experiences dealing with clients), or other life experiences (a blog about dealing with a troubling time such as a disease or divorce, or about a happy time such as preparing for a wedding or a birth of a child).
- A personal blog. A personal blog is a blog all about you. This will include a variety of topics, from things you do on a daily basis, to random thoughts and musings. This is a great way to share you thoughts with the world without having to stick to just one topic.
Once you have a topic it’s time to choose your blog name.
A good blog name should be descriptive so that potential readers can instantly tell what your blog is about just from the name.
If you are blogging about one specific topic then you will definitely want to include that in some way in your blog name. Try not to get hung-up on just one word though. For example, a cooking blog doesn’t necessarily have to have the word “cooking” in it. The words “food”, “recipes”, and “meals” would also let people know that your blog is about cooking.
If you are planning to create a personal blog where you discuss a variety of topics then I recommend using your name, or some variation of it, since your blog is all about you. For example, I own the blog scottchow.com. You can also add your middle name or middle initial if you find your name is already taken. Or you could use a variation like “Scott Chow Blog” or “Blogging with Scott”.
Once you have some blog name ideas you will need to choose a domain extension.
A .com domain extension is the most preferred, but .net or .org work as well. It is also important to note that for the purposes of a blog domain you cannot have any spaces between words. So “Blogging with Scott” becomes bloggingwithscott.com
Now that you’ve got your name and have picked an extension it’s time to make sure that no one else has already registered the same name:
See if your blog name is available
Note: You cannot use any spaces or punctuation other than dashes in a domain name.
If you find that the name you wanted is already taken there are a few things you can do:
- Try a different domain extension. If the .com version is already registered you may still be able to get the .net or .org version of your blog name.
- Add small words. Words like “a”, “my”, or “the”. For example, this site is called TheBlogStarter.com instead of BlogStarter.com.
- Add dashes between words. For example, scott-chow.com
Step 2: Get your blog online
Now that you’ve got a name picked out it’s time to get your blog online. This might sound hard or technical, but the steps below will walk you right through and make the process easy.
To get your blog up and running you need two things: blog hosting and blogging software. The good news is that these typically come packaged together.
A blog host is a company that stores all of the files for your blog and delivers them to the user when they type in your blog name. You must have a blog host in order to have a blog.
You also need to have the software to build your blog. In this guide I will be showing you how to build a blog using the WordPress blogging software, because it is the most popular, customizable, and easiest to use.
The blog host I recommend, and the one I show you how to use in this guide, is BlueHost. I personally use BlueHost and I recommend them for all new bloggers because:
- It will register your blog name for you for free, making sure no one else can take it.
- They offer a free, simple installation of the WordPress blogging software (which I show you how to use in this guide).
- It have been recommended by WordPress since 2005 and currently host over 2 million blogs and websites.
- They have helpful 24/7 customer service via phone or web chat.
- It’ll have a 60 day money-back guarantee if you are unsatisfied for any reason.

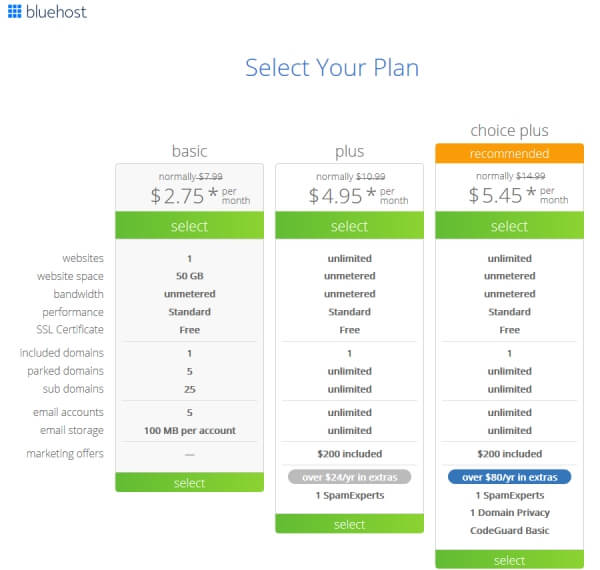
2. Select your plan. I recommend that new bloggers get the basic plan. Click “Select” to choose your plan.
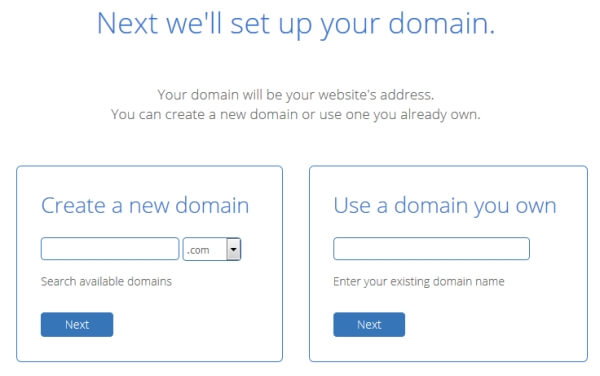
3. Type in your domain name in the left box and then click “next” to start the registration process.
- If you already own a domain name and want to use it for your blog, type your existing domain in the right box and then click “next”. Only use the right box if you have previously paid to register a domain!
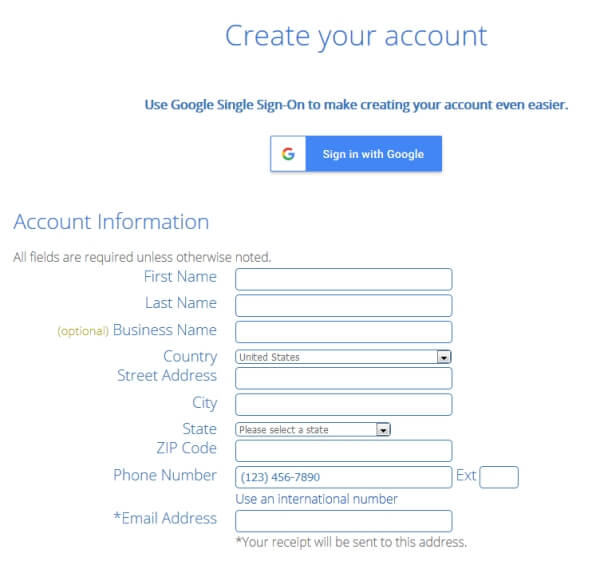
4. Fill out your billing details on the registration page.
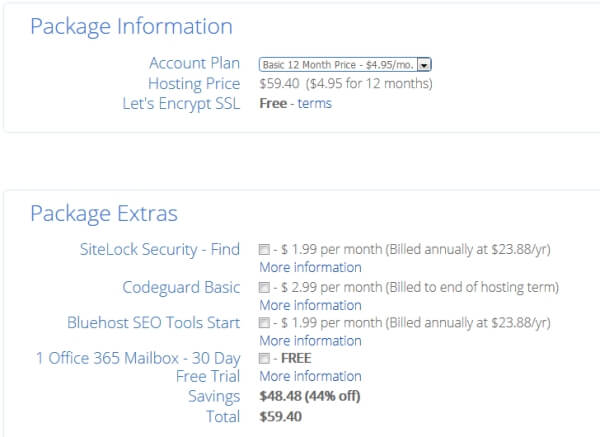
5. You will also need to choose your hosting package and options.
- All packages have everything you need to get your blog up and running, including a free domain name, easy WordPress blog installation, web hosting, and branded email accounts (e.g. yourname@yourdomain.com).
- The 36 month package gets you the lowest monthly rate, while the 12 month package has a lower up-front cost.
- I uncheck the boxes next to the other products when I sign-up. You can always get these products later if you decide you need them.
6. You will then need to create your account and password.
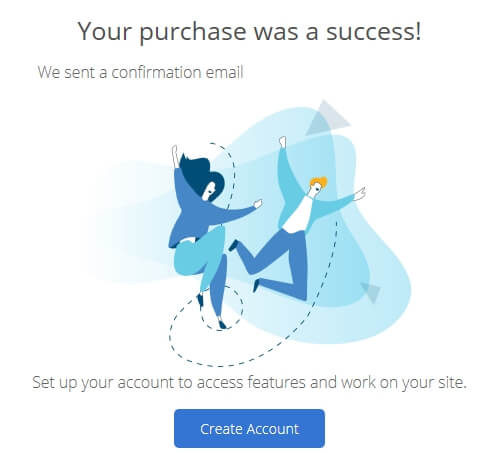
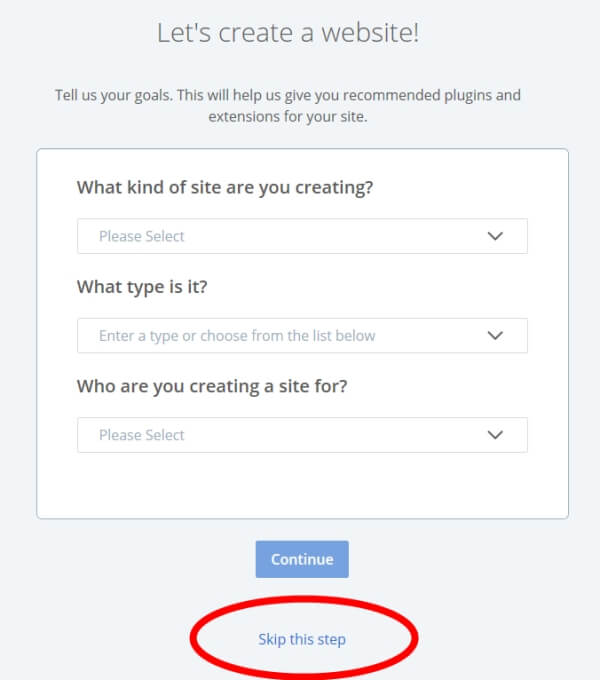
Once you do that you will be taken to an installation helper. Since you are following this tutorial you can just click “Skip this step” on the next few pages to be taken directly to the dashboard.
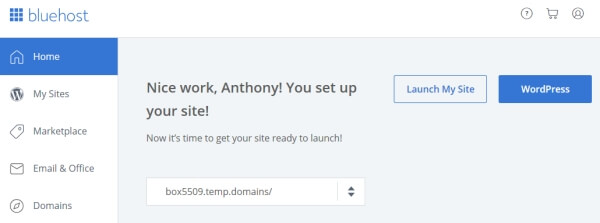
Now your blog software (WordPress) will be installed. Once the install is complete click the blue “WordPress” button to be logged-in to the administrator area of your blog.
Step 3: Customize your blog
Logging in
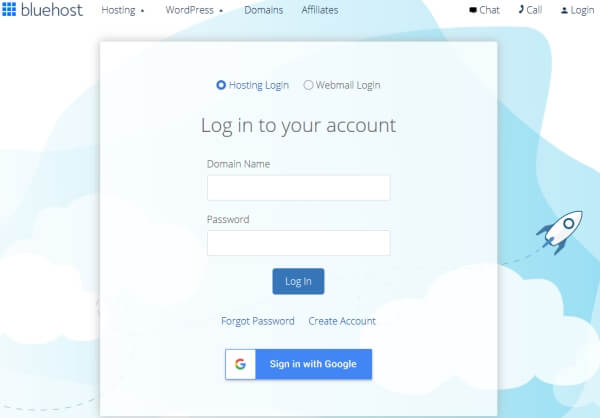
If you are not already logged-in from the previous step, go to Bluehost.com and click “Login” on the top right to bring up the login screen. You can then login using your domain name and the password you set in the previous step. If you have misplaced your password you can reset it by clicking the “Forgot Password” link.
Once you log-in you will be taken to your BlueHost Portal. From the portal you can click the blue “WordPress” button to be logged-in automatically to your blog.
Changing your blog design
Once you login you will be in the WordPress administrator area. This is where you can make any changes you want to your blog.
Everyone has a different idea of how they want their blog to look. One of the great things about a WordPress blog is that you can change your entire layout and design with just a few clicks.
In WordPress, blog layouts are known as “Themes”. What is a blog theme? Themes control the entire design of your blog. To change your theme you are going to click on the “Appearance” tab on the left menu.
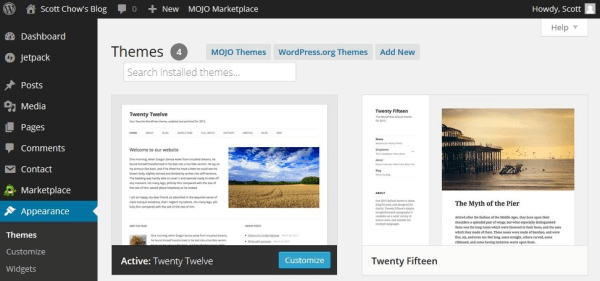
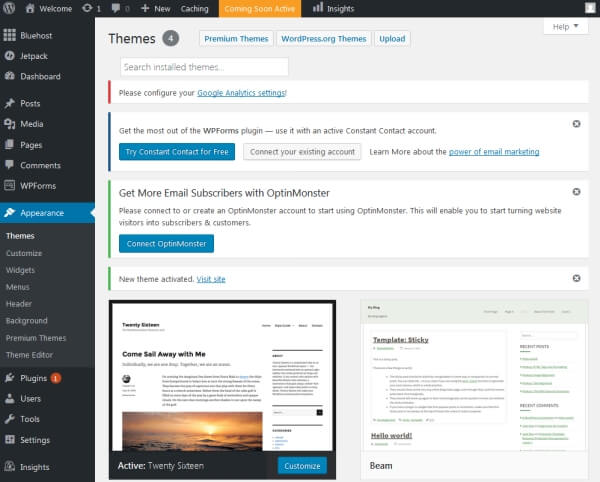
You will see several themes are already installed on your blog: Twenty Seventeen, Twenty Sixteen, etc. These are well-designed, clean-looking themes that can work for just about any type of blog. In fact, many of the world’s top bloggers use one of these themes.
Unless you have a very specific design in mind for your blog, I suggest you use one of these themes to start with. For our example, let’s use the “Twenty Sixteen” theme. In order to activate the theme on your blog, hover over the theme and click the “Activate” button. That’s it! You have changed the entire design of your blog with just one click!
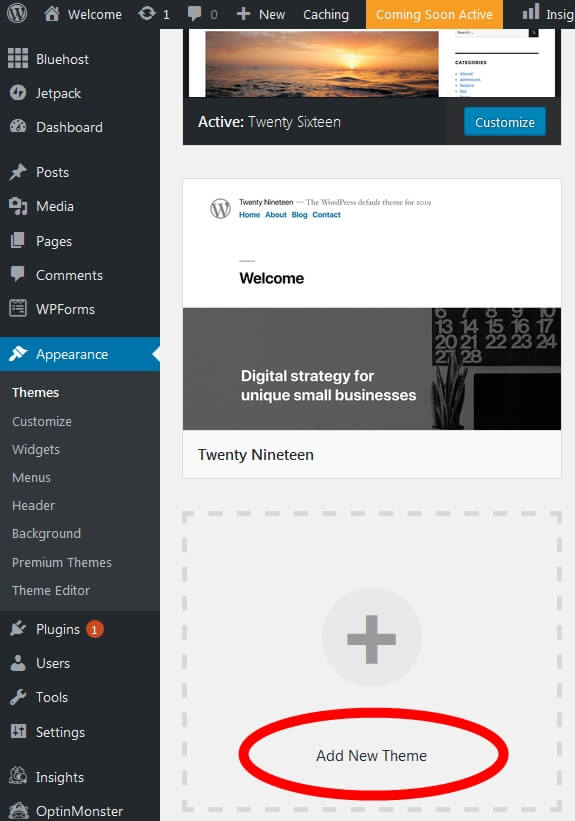
If you don’t like any of the themes that are already installed you can easily choose from thousands of other free themes. To install a new theme, click on the “Appearance” tab on the left menu and then click “Add New Theme”.
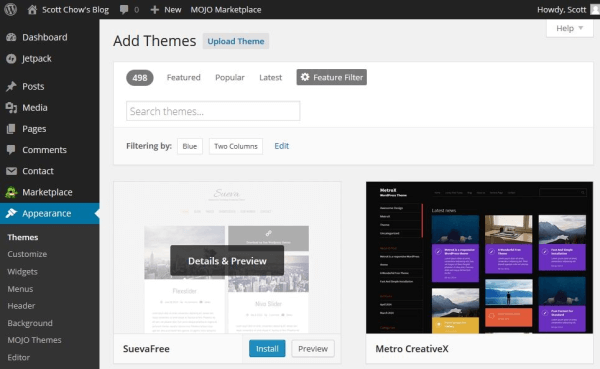
This is the theme search screen. There are thousands of themes to choose from. You can change your entire design at anytime simply by activating a new theme. To find a theme you like, I suggest you click on the “Popular” tab and start browsing. When you find one that you like click the blue “Install” button.
Once the theme is installed click “Activate” to activate the theme on your blog. To see your new theme in action, go to your blog and take a look!
Changing your theme is the simplest way to customize your blog, but there are lots of other customization you can do. You can also watch the video at the end of this guide to see me completely customize a blog from scratch.
Step 4: How to write a blog post & publish it
Now that your blog is up and running it’s time to actually do some blogging!
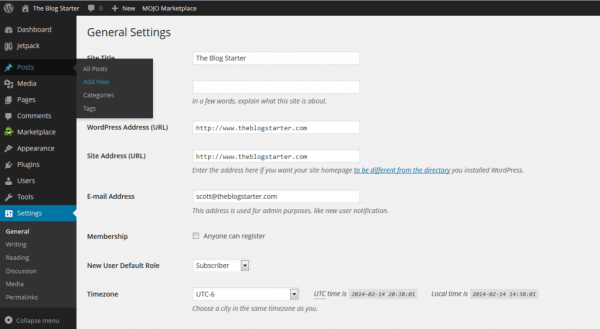
Go to the left menu and click on “Posts”.
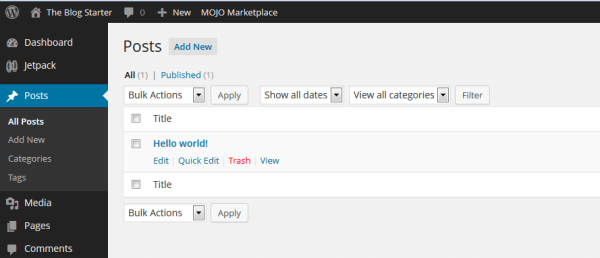
You will see there is already a post there. This is a default post on every new WordPress blog, and we don’t need it. To delete it click “Trash” just under the post.
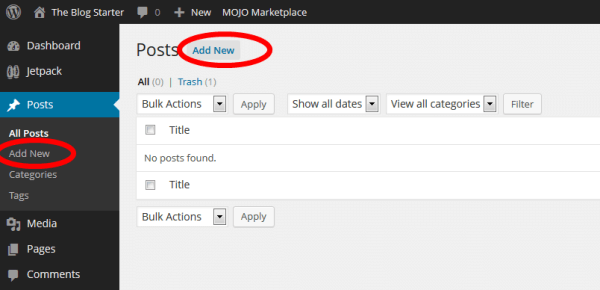
To begin writing a new post, click the “Add New” link.
You are now on the post editor screen. Enter the title of your post in the top box and then begin writing your post in the lower box.
If you would like to add a picture to your post, click on the “Add Image” icon and click “Upload” to upload a picture from your computer. You can make adjustments to the picture size on the next screen. When you are ready click “Insert into post” to add the picture.
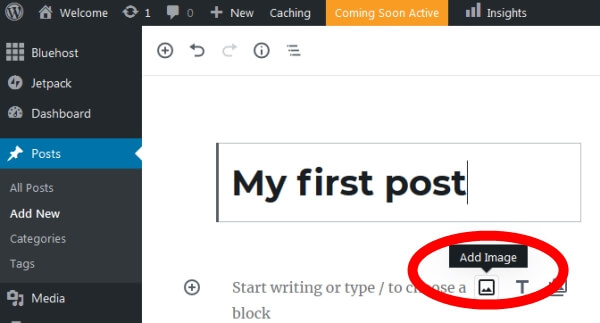
Once you have finished your post just click the “Publish” button on the top right side of the screen to publish it.
Publishing Your Blog
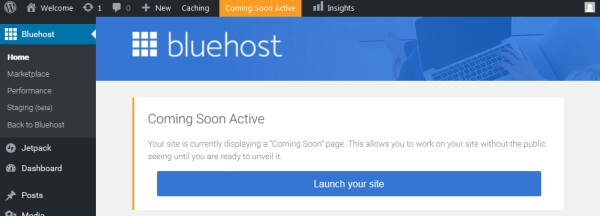
Even after you have written a post your blog may still be showing a “Coming Soon” page.
When you are ready to make your blog public just click the “BlueHost” menu at the top left of the menu in your administrator area then click the blue “Launch” button to remove the “Coming Soon” page.
Congratulations! You now know how to start your own blog and publish content!
Step 5: Promote your blog
Creating a well-designed blog and writing great content is just the start. In order to get readers for your blog you will need spend some time promoting it, especially when you first start. Click on the strategies below for more info.
Alert Your Inner Circle
Use Social Media
Comment on Other Blogs
Engage with Your Readers
Collaborate
Create an Email List
Submit to Search Engines
SEO
Step 6: Make money blogging
Once you have put in the effort of creating great blog content and promoting your blog, making money from your blog is actually the easy part.
Blogs have the potential to be extremely lucrative, but don’t assume that you’re going to start making money in the first week, or even in the first month. It could take six months to a year to start seeing a steady stream of income. Blogging takes work and dedication, but once you develop a large enough audience, there are several methods you can employ to monetize your blog.


What do you think?